どうも!スカーレット坊やです!
今回はXAMPPにインストールされているWordPressを確実に消去する方法です! 中途半端に消すと、データベースが残ったりと色々エラーの原因を作ることになりかねません。
 スカ坊
スカ坊ちゃんとした知識でしっかり運用することは、長くトラブルを起こさないようにする秘訣だね!
では早速行ってみましょう!
XAMPPのアンインストール、削除すべきは2つのみ!
この2つさえちゃんと消してしまえばアンインストールは完了です。
- WordPressの本体フォルダ
- データベースのフォルダ
スカ坊じゃあ早速この2つの消し方を見ていこう!
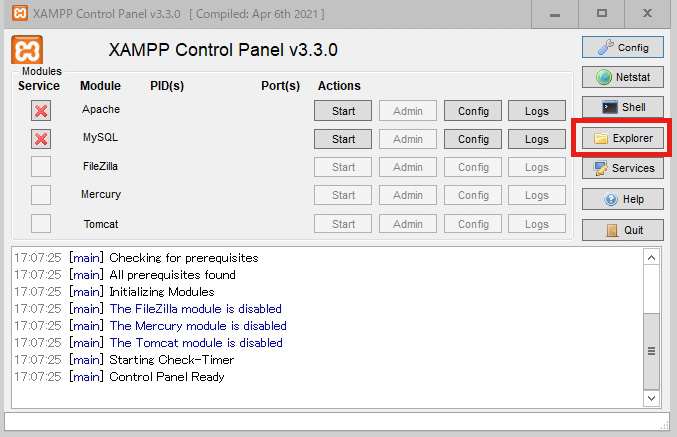
まずはXAMPPの操作パネル、右側にある「Explorer」をクリックしてフォルダを開こう。
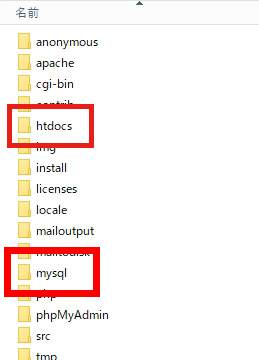
「htdocs」と「mysql」にそれぞれ消すべき物があるので順に消していきましょう。
WordPressを削除していく
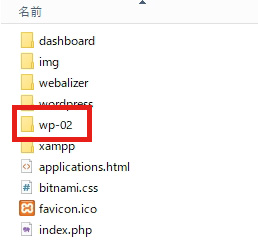
まずは htdocsフォルダの中のWordPressフォルダである「wp-02」を削除。この名前は各々つけていると思うので、自分がつけた名前のWordPressです。
スカ坊もし消しちゃうのが不安ならどこかへリムーブしてもいいよ!
これでWordPressの削除は完了です
データベースを削除しよう
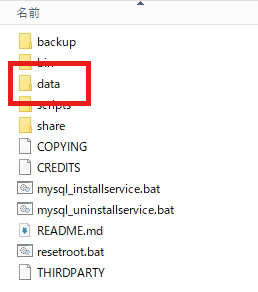
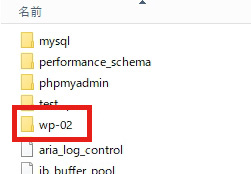
mysqlフォルダ → date → データベースを選択して「削除」
※ここではwp-02を削除します。
スカ坊これでデータベースの削除も完了しました、これでWordPressの消去は完了です!
データベースを探そう
自分の作ったデータベースが分からない時のデータベースの探し方は
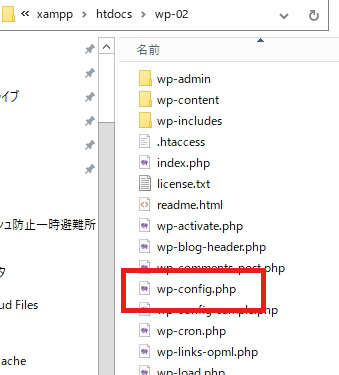
削除したいWordPress「wp-02」フォルダの中にある wp-config.phpをテキストエディタで開こう。
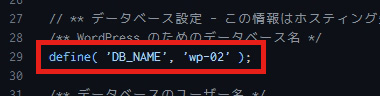
このフレーズを探し出してデータベース名を確認 wp-02 という名前です。WordPressと同じ名前になっていますね。
データベース名とフォルダ名が違っていた場合
この場合はphpMyAdminを使って調べていきましょう
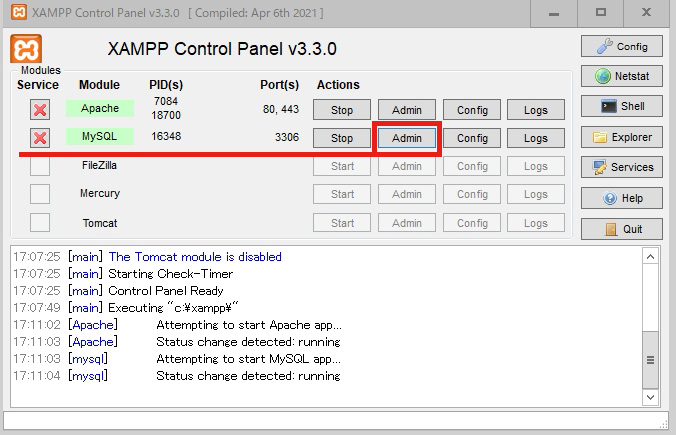
MySQLの「Admin」ボタンをクリック
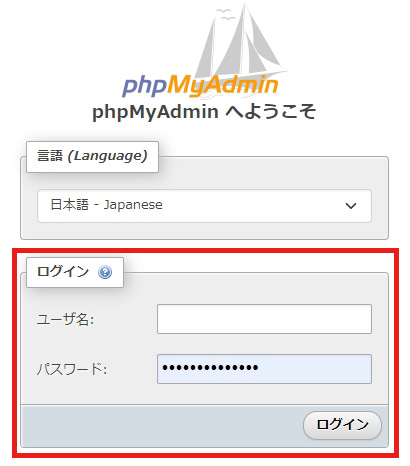
phpMyAdminへログインしよう
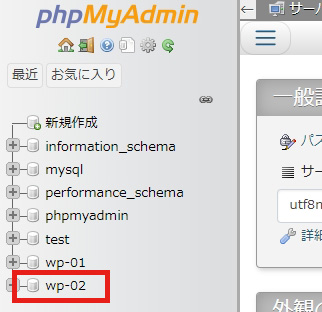
WordPressの名前を選択して…
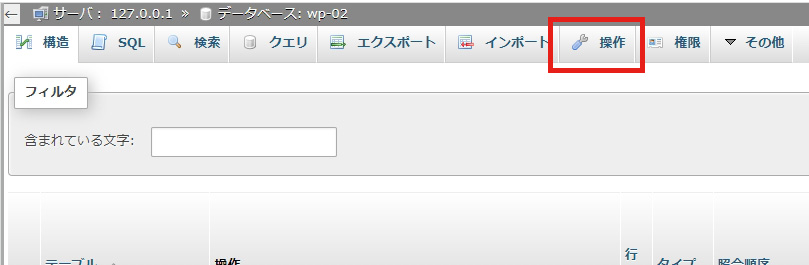
操作ボタンをクリック。
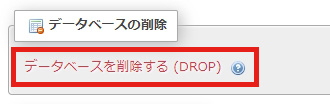
この赤文字をクリックする。
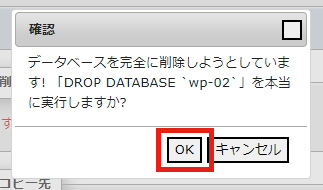
このポップアップが出るので、良ければOKをクリックしよう。
スカ坊これでデータベースの削除は完了!
データベースの名前やWordPressの名前はきちっと覚えておこう。作業では出てこないので忘れがちだけど、トラブル対策がスムーズになるよ!
こちらも併せてぜひお読みください。


ついにXAMPPの記事を書き終えたな!
「坊やだからさ~はっはっは」
それではまた!
※ IDを指定してください。